Kitchen Cabinet Installation Instructions / How To Install Kitchen Cabinets Diy Family Handyman - However, if you have tall cabinets, like a pantry or
Kitchen Cabinet Installation Instructions / How To Install Kitchen Cabinets Diy Family Handyman - However, if you have tall cabinets, like a pantry or. If the cabinet isn't plumb, slip shims between the cabinet and wall at the stud lines and adjust as necessary. Determining the installation order of the cabinets depends on the plan. Always start in a corner where two runs of assembled kitchen cabinets will come together. Be sure to use a level to assure this line will be true horizontal. Be sure to check for level before fastening cabinet into place.
Brad nailer assembly downloadable instructions (pdf) base cabinet assembly video. If the cabinet isn't plumb, slip shims between the cabinet and wall at the stud lines and adjust as necessary. Add the gap to the height and mark the top and bottom of the cabinet. The horizontal line on the wall is your main guide. Cabinet installation can seem like a monumental task, but at kitchen craft our cabinets are designed to be simple to install.
Build A Diy Mini Kitchen For Under 400 Handmade Charlotte from s34506.pcdn.co Start installing the base cabinets in the corner (if applicable). Using the clamps, align and join the cabinets. Use the stud finder to locate and mark the studs along this line around the room. Step #8 begin corner cabinet installation. The line on the floor is your secondary guide. Install adjacent cabinets place the next cabinet on the wall at the reference line. A ledger is a board that helps support the cabinetry as you work. Our online presence open 24/7.
The instructions given here serve as a general guideline on how to install frameless cabinets in a reasonably simple installation.
Using the clamps, align and join the cabinets. To properly secure wall cabinets larger than 15 wide, and to reduce the risk of cabinets falling and causing serious injury, use at least 4 installation screws and make sure the screws go into the studs at least 1. As a general rule it is better to start with wall cabinets in the corner and work out. Start installing the base cabinets in the corner (if applicable). Use the installation instructions included with drawer kits and hinges to determine hole locations your configuration will use. By placing layout markings on the walls … Always start in a corner where two runs of assembled kitchen cabinets will come together. If the cabinet isn't plumb, slip shims between the cabinet and wall at the stud lines and adjust as necessary. Orient the first peninsula cabinet at a right angle to the wall. Step #8 begin corner cabinet installation. Then, measure that distance from the top and bottom of the cabinet and mark the locations with a pencil. Be sure to check for level before fastening cabinet into place. We're here to answer any questions you have about the kitchen design and installation process.
Start with the corner lazy susan cabinet. Starting with a corner, use the guides you marked on the walls to transfer the stud locations to the cabinets, taking care to account for the face frame. Remove cabinet doors and set them aside. Cabinet installation can seem like a monumental task, but at kitchen craft our cabinets are designed to be simple to install. Add the gap to the height and mark the top and bottom of the cabinet.
Malibu White Collection Cabinets To Go from cdn.shopify.com However, if you have tall cabinets, like a pantry or (see below for a shopping list, tools, and. Use clamps to fix the stiles (the vertical pieces on the face of the cabinet frames) of the cabinets together and check for plumb, making sure the fronts of the cabinets are flush. A ledger is a board that helps support the cabinetry as you work. As a general rule it is better to start with wall cabinets in the corner and work out. To properly secure wall cabinets larger than 15 wide, and to reduce the risk of cabinets falling and causing serious injury, use at least 4 installation screws and make sure the screws go into the studs at least 1. Add the gap to the height and mark the top and bottom of the cabinet. Remove cabinet doors and set them aside.
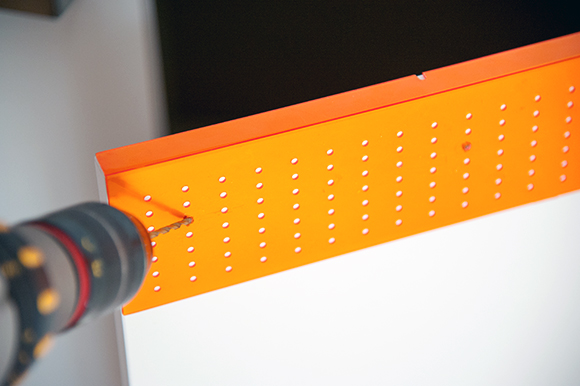
Drill the holes and set the corner cabinet in place.
Determining the installation order of the cabinets depends on the plan. Use a level to ensure your cabinets are installed accurately. Starting with the corner wall cabinet, install 4 cabinet screws through the fastening strips on the cabinet into the wall studs. Place the corner cabinet into position on the wall stud marking. Then, measure that distance from the top and bottom of the cabinet and mark the locations with a pencil. Let our professionals show you proper preparation and installation for a variety of frameless cabinets. To properly secure wall cabinets larger than 15 wide, and to reduce the risk of cabinets falling and causing serious injury, use at least 4 installation screws and make sure the screws go into the studs at least 1. Place the corner cabinet & the adjoining cabinets to either side into position. Step #8 begin corner cabinet installation. 2.5 in order to attach two cabinets, you will need to clamp them together first. Now that you have your new kitchen cabinets, you are ready to move on to the next big step….installing your kitchen cabinets. Remove cabinet doors and set them aside. Cabinet installation can seem like a monumental task, but at kitchen craft our cabinets are designed to be simple to install.
A ledger is a board that helps support the cabinetry as you work. Always start in a corner where two runs of assembled kitchen cabinets will come together. Take your gap measurement and add it to 3.5 inches (8.9 cm), the distance you measured to install your hinge cups. Cabinet installation can seem like a monumental task, but at kitchen craft our cabinets are designed to be simple to install. Insert the hinge into this hole and make sure the arm is at exactly 90° to the door edge using a 90° try square.
Fitting Kitchen Cabinet Hinges How To Guides For Concealed Kitchen Hinges from cdn.shopify.com Remove cabinet doors and set them aside. Drill the holes and set the corner cabinet in place. Let our professionals show you proper preparation and installation for a variety of frameless cabinets. Start installing the base cabinets in the corner (if applicable). The most basic application is to install one (or more) 5⁄8 fillers between wall and cabinet or cabinet and cabinet. This old house general contractor tom silva shares expert tips and techniques for installing new kitchen cabinets. Fix the hinge to the door using the screws provided. Then, measure that distance from the top and bottom of the cabinet and mark the locations with a pencil.
Be sure to use a level to assure this line will be true horizontal.
Orient the first peninsula cabinet at a right angle to the wall. Drill pilot holes through the sturdy cabinet back or its support rail and into the wall studs. As a general rule it is better to start with wall cabinets in the corner and work out. Take your gap measurement and add it to 3.5 inches (8.9 cm), the distance you measured to install your hinge cups. Be sure to check for level before fastening cabinet into place. Remove cabinet doors and set them aside. Align the bottom and side rails with the other cabinets and attach to the wall. When beginning a diy kitchen cabinet install, always start in a corner where two runs of assembled kitchen cabinets will come together. Step #8 begin corner cabinet installation. Kitchen cabinet depot wall cabinet assembly. Many cabinet designs and installations may be far more Measure base cabinets and use the pencil and level to mark a level line on the wall from the high point in the floor to the cabinet height. Starting with the corner wall cabinet, install 4 cabinet screws through the fastening strips on the cabinet into the wall studs.


No comments:
Post a Comment